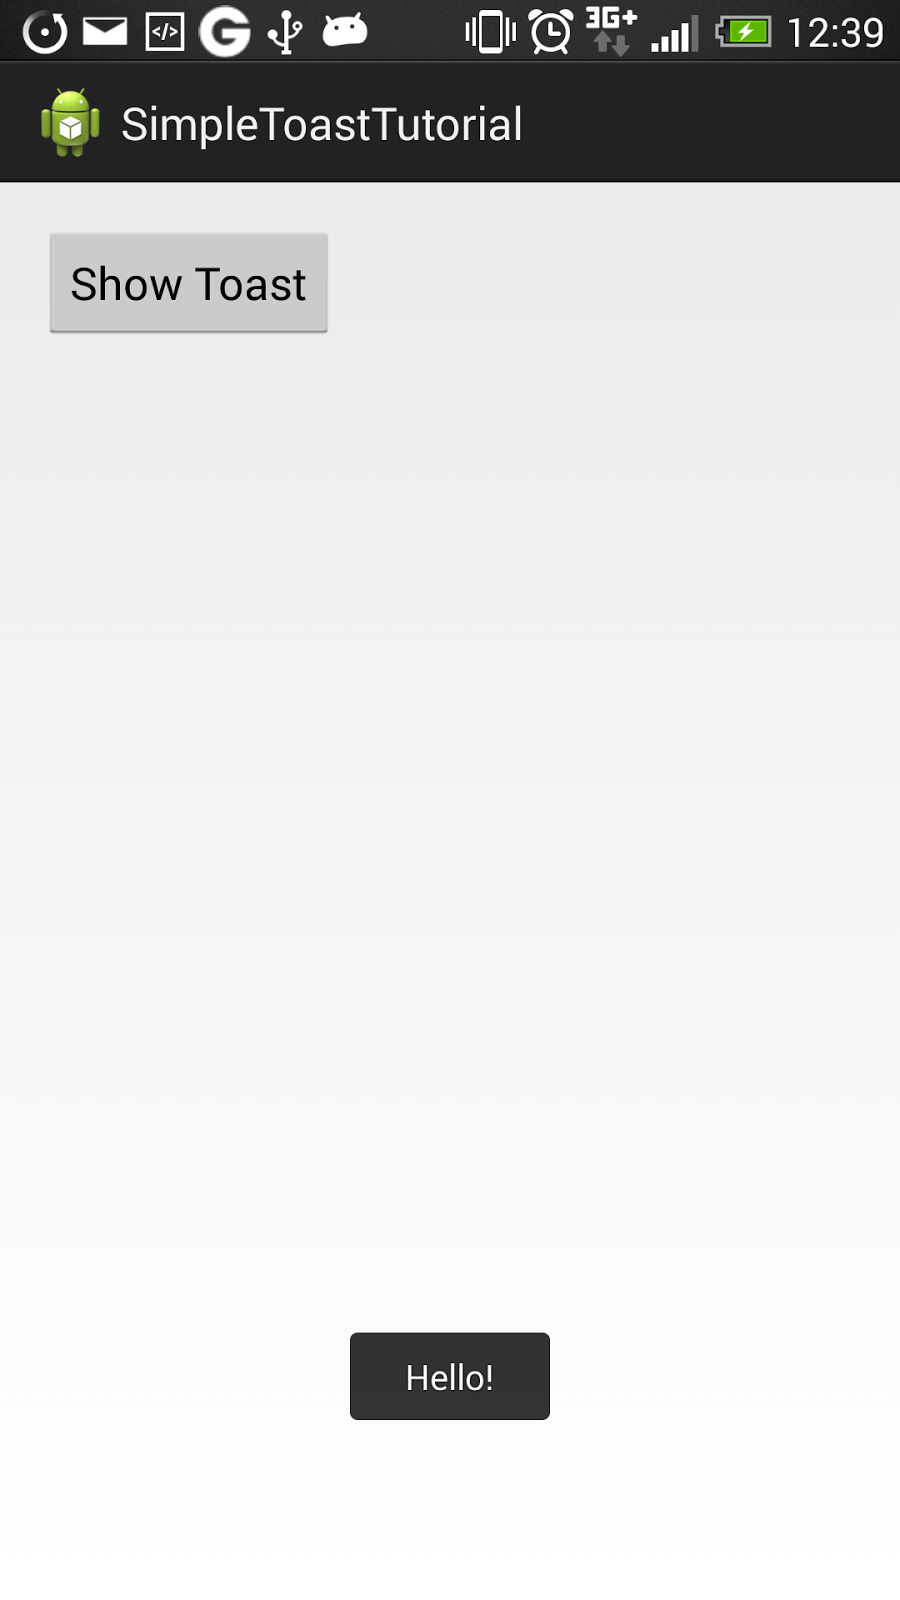
Toast is a simple pop-up notification message, that automatically fades away after a certain amount of time. Toasts are used to notify user of a completion of certain operation, for example, if you are working on a task management application, toast can be used to tell your user that a task has been successfully saved.
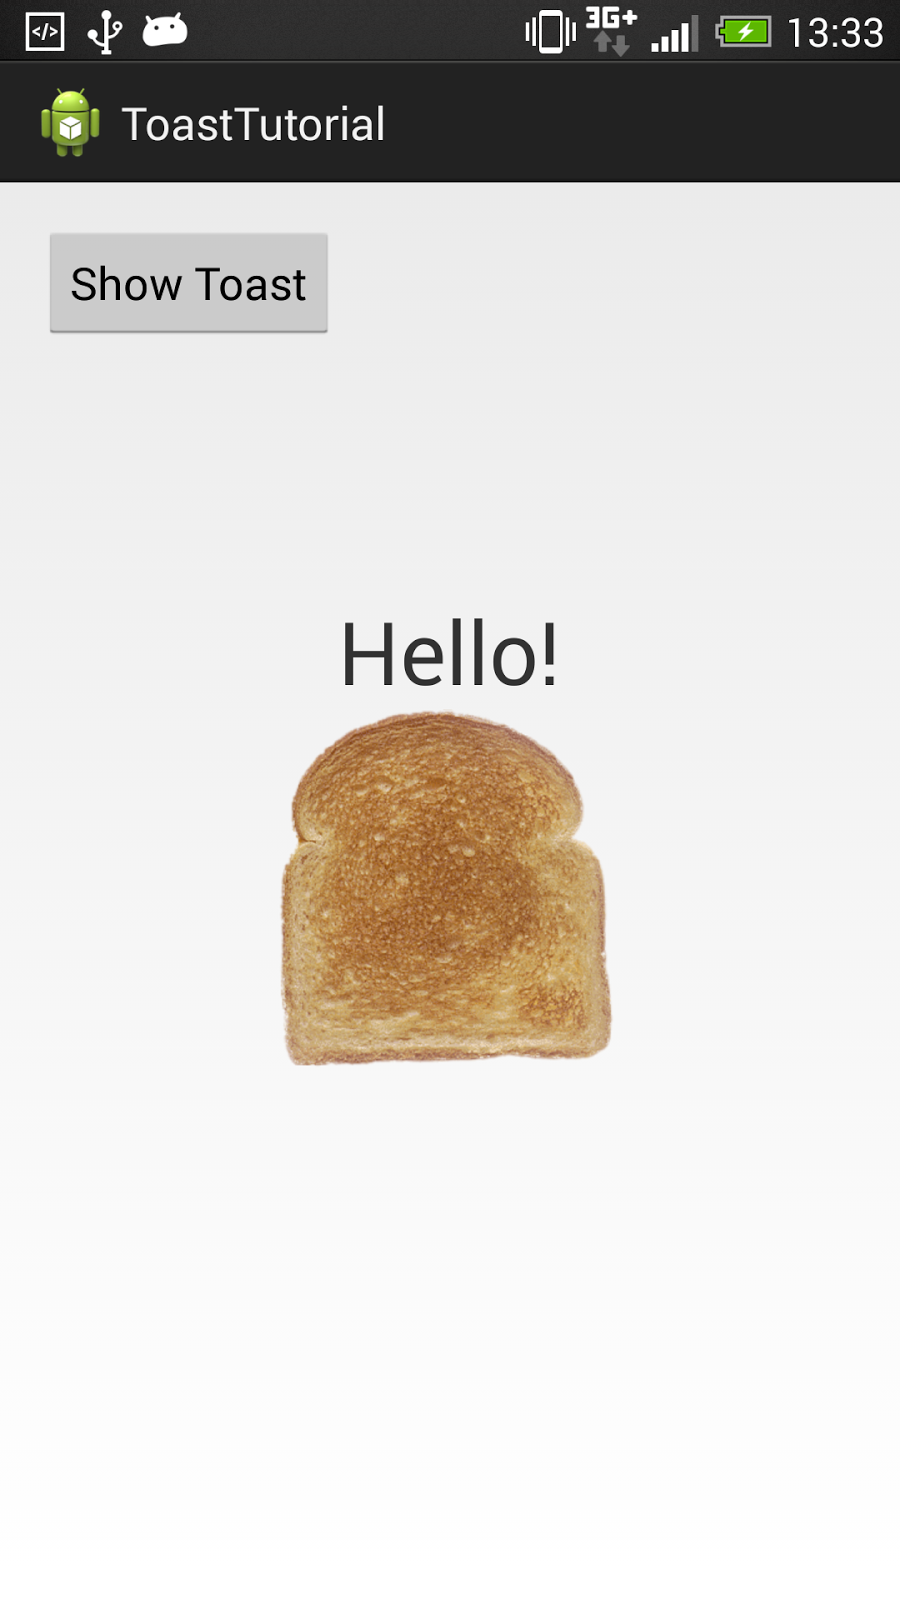
Toast can be displayed as a simple text message or a more informative and pretty customised view. We will take a look at both ways, and start with a simple one:
Simple Toast View
I will use a button to display our toast, so first thing that we need to do is to add a button element to the app layout:
activity_main.xml file:
| 1234567891011121314151617 |
<RelativeLayout xmlns:android="http://schemas.android.com/apk/res/android"

xmlns:tools="http://schemas.android.com/tools"

android:layout_width="match_parent"

android:layout_height="match_parent"

android:paddingBottom="@dimen/activity_vertical_margin"

android:paddingLeft="@dimen/activity_horizontal_margin"

android:paddingRight="@dimen/activity_horizontal_margin"

android:paddingTop="@dimen/activity_vertical_margin"

tools:context=".MainActivity" >


<Button

android:id="@+id/button1"

android:layout_width="wrap_content"

android:layout_height="wrap_content"

android:text="Show Toast" />


</RelativeLayout>
|
Now lets go ahead and modify our activity file.
MainActivity.java file:
| 123456789101112131415161718192021222324252627282930313233343536 |
package simpletoasttutorial.tktutorials.com;


import android.app.Activity;

import android.content.Context;

import android.os.Bundle;

import android.view.View;

import android.view.View.OnClickListener;

import android.widget.Button;

import android.widget.Toast;


public class MainActivity extends Activity {


public Button showToast;

public int duration;

final Context context = this;


@Override

protected void onCreate(Bundle savedInstanceState) {

super.onCreate(savedInstanceState);

setContentView(R.layout.activity_main);


showToast = (Button) findViewById(R.id.button1);

duration = Toast.LENGTH_LONG;


showToast.setOnClickListener(new OnClickListener() {


@Override

public void onClick(View arg0) {


Toast.makeText(context, "Hello!", duration).show();


}

});

}


}
|
Explanation:
To display a toast message we are using makeText() and show() methods.
makeText() method requires three parameters to be passed on to it:
- application context
- message text - in our case it is a string "Hello!"
- duration - we've declared this variable in the beginning of the activity class and set its value to duration = Toast.LENGTH_LONG; (line 23) which means that we will show the message for a long period of time. Alternatively this variable value can be set toToast.LENGTH_SHORT;
Demo
 |
| Android Simple Toast Example |

Custom Toast View
To have a prettier toast message displayed in your application you will need to create a customized layout for your toast. To create a customized layout go to the res/layout directory, create a new xml file and paste the following code into it:
toast_layout.xml file:
| 1234567891011121314151617181920 |
<?xml version="1.0" encoding="utf-8"?>

<LinearLayout xmlns:android="http://schemas.android.com/apk/res/android"

android:id="@+id/toast_layout_root"

android:orientation="vertical"

android:layout_width="fill_parent"

android:layout_height="fill_parent"

android:padding="8dp"

>

<TextView android:id="@+id/text"

android:layout_width="wrap_content"

android:layout_height="wrap_content"

android:textSize="35sp"

android:layout_gravity="center_horizontal"

/>

<ImageView android:src="@drawable/toast_big"

android:layout_width="wrap_content"

android:layout_height="wrap_content"

android:layout_marginRight="3dp"

/>

</LinearLayout>
|
As you can see our layout has two elements:
- TextView - to display out toast message text;
- ImgaeView - to display an image;
Important!
On line 3 our layout id is defined, which is required to be able to inflate this layout from XML.
Now (as you've probably guessed already:) we need to modify our activity file.
ActivityMain.java file:
| 1234567891011121314151617181920212223242526272829303132333435363738394041424344 |
package toasttutorial.tktutorials.com;


import android.app.Activity;

import android.os.Bundle;

import android.view.Gravity;

import android.view.LayoutInflater;

import android.view.View;

import android.view.View.OnClickListener;

import android.view.ViewGroup;

import android.widget.Button;

import android.widget.TextView;

import android.widget.Toast;


public class MainActivity extends Activity {


public Button button;


@Override

protected void onCreate(Bundle savedInstanceState) {

super.onCreate(savedInstanceState);

setContentView(R.layout.activity_main);


button = (Button) findViewById(R.id.button1);


button.setOnClickListener(new OnClickListener() {


@Override

public void onClick(View v) {

LayoutInflater inflater = getLayoutInflater();

View layout = inflater.inflate(R.layout.toast_layout,

(ViewGroup) findViewById(R.id.toast_layout_root));


TextView text = (TextView) layout.findViewById(R.id.text);

text.setText("Hello!");


Toast toast = new Toast(getApplicationContext());

toast.setGravity(Gravity.CENTER_VERTICAL, 0, 0);

toast.setDuration(Toast.LENGTH_LONG);

toast.setView(layout);

toast.show();

}

});

}

}
|
Explanation:
line 29 - first we need to retrieve LayoutInflator using getLayoutInflator() method. Then we create a view object and, using LayoutInflator that we have just retrieved, we inflate the layout from XML into a View object;
line 33 - set the value of the TextView;
line 37 - set the location at which the notification should appear;
line 38 - set duration;
lines 39-40 - set the view to show and call show() to display our toast.
Demo
 |
| Android Custom Toast Example |
Source Code
References:
http://developer.android.com/guide/topics/ui/notifiers/toasts.html
Toast imgae is taken from here:
http://www.wpclipart.com/food/breads_and_carbs/bread/toast.png.html


0 comments: